
<--- 返回所有 Blog 及新聞

Introduction
This guideline is to show how a New User register the Insight Pro account to entitle the 1-YEAR Insight Included Program for the purchased model.
For the complete list of the NETGEAR devices entitled to the 1-YEAR Insight Included program, please visit https://netgear.techgear.com.hk/pages/insight-subscription
Preface
- NETGEAR Insight provides 2 types of subscription plans: Insight Premium and Insight Pro. The features vary for the 2 subscription plans, with Insight Pro includes the most features.
- For customers who have registered their Insight accounts previously, the 1-YEAR Free Insight subscription will default to existing plan. This is because Insight only supports one plan type within one account, meaning all devices within one Insight account can have only one Insight plan type, e.g. all on Insight Pro or all on Insight Premium.
- Example: If the Insight account was created previously, and is subscribed to Insight Premium plan, once the user register a new device to the Insight account, a 1-year free Insight Premium subscription will be added to the new device.
- For customers NEW to Insight, they can enjoy 1-YEAR Insight Pro subscription for free for the new device.
Before you start
Prepare for registration
a) An email address which has not registered any type of Insight account.
b) Serial Number(s) of the newly purchased device(s).
Start the registration
1. Open a browser and go to https://insight.netgear.com/#/register (You must use this link for registering an Insight Pro account.)
Enter the email and press Next.

2. Fill in the Primary Contact Information and press Next.

3. Press Add Insight Included Device.

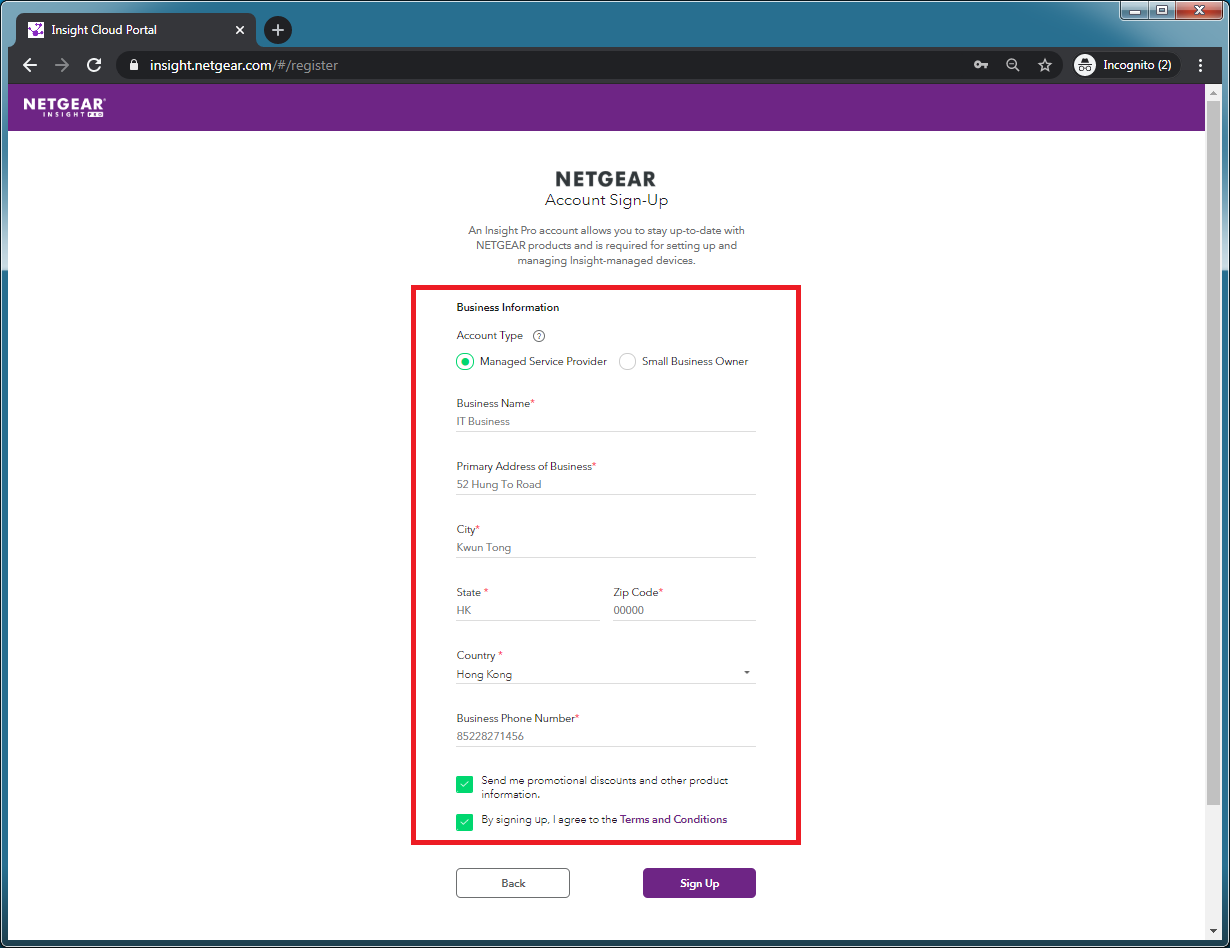
4. Fill in the Business Information and press Sign Up.
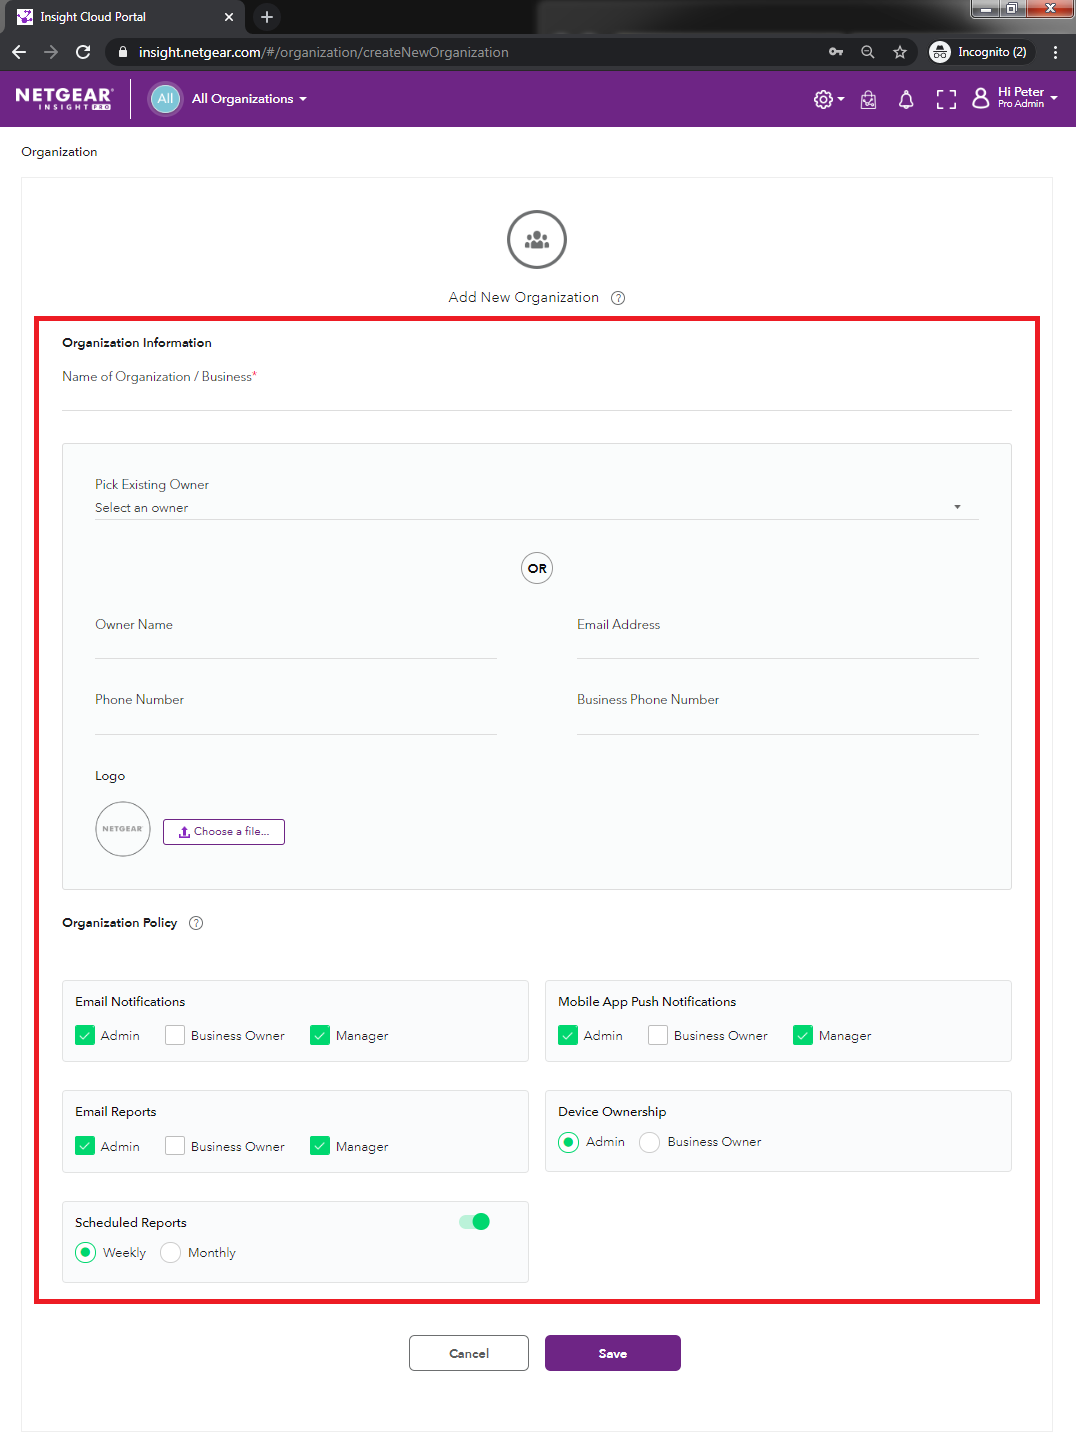
5. To add the new device into the account, you need to create an Organization and Location first. Press Add Organization.

6. Fill in the Organization Information and press Save.
7. Now the Organization has been created. Next, we need to create a location.
Click the organization name that you have just created.

8. Press ‘ + ’ icon under Locations and choose Add Single Location.

9. Fill in the location details and press Save.

10. The location has been created and we can now add the new device.
Click the Location name that you have just created under Locations.

11. Press the ‘+’ icon, and press Add Single Device.

12. Input the product Serial Number in the pop-up box. The Serial Number can be found at the bottom of the device or on the packaging box.

13. NETGEAR Insight will detect the Serial Number and show the corresponding model.
Press Next once confirmed the model is correct. You may also rename the device.

14. Your device is now added into the location and synchronizing the configurations.

15. To check the license status, click the User Account Name at the top right corner, and press Account Management.

16. Click Purchase Order History. The subscription license type, activation date and expiry date will be shown.
